How to Get an Awning Tight to a Caravan
Struggling with floppy caravan awnings? The key to a tight fit lies in proper tensioning, secure fastening, and the right tools. Get it right, and you'll transform your outdoor space from a wind-catching nightmare into a cosy haven. Learn the essential techniques for installing and tensioning your awning like a pro.

Ensuring a Secure Fit
The secret to a perfectly fitted awning starts long before the first peg hits the ground. Think of it like building a house - without solid foundations, everything else becomes unstable.
Checking the Awning's Fit
Getting the basics right makes all the difference between a taut, weatherproof shelter and a saggy disappointment. The initial setup phase determines how well the awning will perform throughout its life.
Correct Awning Size
Most awning disasters stem from poor sizing. Just a few centimetres off in measurement can lead to hours of frustration later.
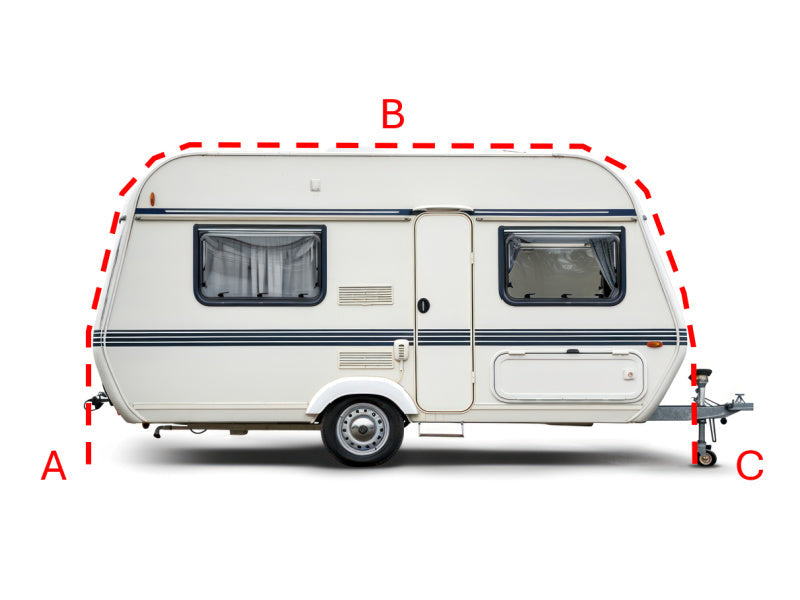
Start by measuring the awning rail length with absolute precision. Even small discrepancies can cause major headaches down the line. Take multiple measurements to ensure accuracy.
The awning's height needs particular attention. An awning that's too tall or short won't just look wrong - it'll never achieve proper tension.
Check the attachment points carefully. Different caravan manufacturers use varying fixing systems, and compatibility issues can cause major problems if discovered too late.
Proper Installation
Safety comes first when fitting any awning. Working at height requires proper equipment and careful attention to surroundings.
A sturdy ladder with rubber feet provides essential stability. Forget about balancing on camping chairs or other makeshift platforms - that's asking for trouble.
Proper safety gear isn't just a suggestion. Gloves protect hands from sharp edges and provide better grip. Safety glasses prevent debris from causing eye injuries during overhead work.

The manufacturer's guidelines exist for good reason. Each awning has its quirks and specific requirements. Following these instructions step by step prevents costly mistakes.
Double-checking all mounting points takes extra time but saves hours of troubleshooting later. A loose bracket now becomes a major problem in bad weather.
Adjusting the Caravan
The caravan's position plays a crucial role in achieving perfect awning tension. Even the best awning won't sit right on an unlevel base.
Levelling the Caravan
Getting the caravan perfectly level isn't just about comfort inside - it directly affects awning performance.
Use a quality spirit level on multiple points. Check both lengthways and across the width of the caravan. Small adjustments make big differences.
Ground conditions matter enormously. Soft or uneven ground can shift over time, affecting both caravan stability and awning tension.
Wheel position adjustments might seem minor, but they influence the entire setup. Take time to get this right before moving forward.
Stabiliser legs need careful positioning. They shouldn't just touch the ground - they need to provide genuine support without over-tensioning.
Adjusting Outriggers (if applicable)
Outriggers add another layer of complexity but provide valuable support when used correctly.
Extension should follow manufacturer guidelines exactly. Over-extension can stress components, while under-extension won't provide adequate support.
Locking mechanisms need thorough checking. A seemingly secured outrigger that later shifts can destabilise the entire awning structure.

Weight distribution matters significantly. Outriggers should share the load evenly, preventing stress points that could damage both awning and caravan.
Regular alignment checks help catch potential issues early. What starts as a slight misalignment often develops into a bigger problem over time.
Tensioning Techniques
Proper tension transforms a good awning setup into an excellent one. This crucial step determines how well the awning performs in varying weather conditions.
Guy Lines and Pegging
The art of guy line setup combines science and experience. Proper technique here makes the difference between a stable awning and a potential hazard.
Using Ratchet Straps
Ratchet straps provide outstanding tension control when used correctly. Space them evenly for balanced pressure distribution.
Start with minimal tension everywhere. Building tension gradually prevents stress points and allows for final adjustments.
Check tension levels regularly during setup. Uneven tension leads to water pooling and potential damage during rain.
Weather conditions affect strap performance significantly. Hot weather can cause straps to stretch, while cold weather might require slight loosening to prevent over-tensioning.
Regular strap inspections prevent nasty surprises. Look for signs of wear, particularly around buckles and attachment points.
Adjusting Awning Poles
Pole adjustment might seem straightforward, but proper technique matters enormously.
Height adjustments need careful consideration. Too high creates excess strain, while too low affects headroom and water runoff.
Even tension across all poles prevents twisting and strain. Work systematically, making small adjustments rather than dramatic changes.
Weather changes require ongoing attention to pole settings. What works perfectly on a calm day might need adjustment when wind picks up.
Regular maintenance checks help spot potential issues before they become problems. Look for signs of wear on pole joints and tension mechanisms.
Final stability checks should become routine. Give poles a gentle shake - any movement indicates the need for additional adjustment.
Remember that achieving perfect awning tension isn't a one-time task. Weather changes, ground shifts, and normal use all affect how well an awning stays secured. Regular checks and minor adjustments keep everything taut and trouble-free.
Developing a systematic approach to awning setup and maintenance pays dividends in the long run. Each successful setup builds experience, making future installations smoother and more efficient.
Keep a basic tool kit handy for adjustments. Include spare pegs, a mallet, and basic repair materials. Being prepared for minor adjustments prevents small issues from becoming major problems.
With proper attention to detail and regular maintenance, a well-tensioned awning provides years of reliable service. The effort invested in correct setup returns enormous dividends in comfort, safety, and peace of mind.
Other content you might like:


Leave a comment